Thursday, April 27, 2017

Custom Cocktails: Step 1, Infuse your liquor

I have a bit of a reputation for making unusual (and tasty) cocktails featuring unexpected flavors. One of my favorite things to use in these is infused vodka (and tequila).  Now, many people think it's super fancy and difficult to make these (it's not). Others think it's somehow dangerous (it's not, to my knowledge).

My latest obsession is vodka infused with vegetables.  To be specific, I've been enjoying celery and beet infusions, along with my ubiquitous dried chile vodka.  Veg cocktails are fun, different, and pair really well with food.

Want to get in on the fun?  Grab a bottle of vodka, some veg, and let's go!

Ingredients

Neutral vodka (I like the Kirkland brand American vodka at Costo)
organic celery, washed well and sliced horiontally
celery seed
red beets (peeled and cut into chunks - doesn't need to be organic since you peeled them)
dried organic chile peppers (I grow and dry red cayenne, but any chile will work)
3 pint size ball jars with lids


In the first jar, add about 1/2 cup celery slices.  Add 1tsp. celery seed.  Fill with vodka, screw the lid on very tightly, and shake.

In the second jar, add about 1 /2 cup of beet chunks, fill with vodka, screw the lid on very (very) tightly, and shake.

In the third jar, break up 4-5 dried chiles.  Fill, with vodka, screw the lid on tightly, and shake.

Set jars aside overnight, then place in refrigerator.  Let infuse in the fridge for at least a week, drain out the veg, and enjoy!

Stay tuned for new recipes on what to do with your *fancy* new infused vodkas...

Back to Teaching! All About Herbs: Culinary Magic and Sustainability

Come join us for a fun, hands-on class about all things herbs.  We will discuss growing, maintaining, ,and using the bounty you get when you grow your own herb garden.

https://www.eventbrite.com/myevent?eid=34106574683

Thursday, October 22, 2015

Not pumpkin spice...but yes to cider + tequila - custom cocktail series

I don't get the obsession with pumpkin spice. It's gotten completely out of control. 

That being said, I adore fall, apple everything, and yes, pumpkin. 

Oh, and I like tequila. If you do, too, mix this up and toast this fab season. 

Ingredients
3 oz reposado tequila
4 oz apple cider
Juice of one lime
3/4 oz agave nectar
Pinch of ground cinnamon

Mix all ingredients in a shaker over ice, shake well, and pour into a martini glass. 


The magic of cherry and mezcal - custom cocktail series

I love interesting, not too sweet cocktails. I especially love the ones made with mezcal. There is something magical about the smoky spirit this time of year. 

Cherry juice provides an interesting counterpoint, balancing the bite of the mezcal without over-sweetening. 

This is one for the bucket list...and don't forget the salted rim. 

Ingredients
3 oz mezcal
2 oz tart cherry juice (I found this at target, Cherribundi brand)
1 oz Grand Marnier
Juice of one lemon
1/4 oz agave nectar
Freshly ground black pepper

Mix all ingredients together in a shaker over ice. Shake very well and pour into a salt-rimmed glass. 

Bonus points if you use citrus salt. 

Thursday, September 17, 2015

Fermented Apple-Cranberry Butter

Like anyone, there are things I am passionate about, and things I could care less about.  There are things I enjoy doing, and things I dread.  Independent of all that, there are some things that are just hard-wired into me, and I am simply compelled to do them.
One of these hard-wired attributes that I'm known for all around town is my unwillingness to throw anything usable out.  I learned this from my dad.
Dad has always been a Renaissance man.  If it's broken, he can fix it.  If he needs it, he can design and build it.  If it needs used up, he has ideas.  If it's a problem, he can solve it.  If it needs support he can reinforce it.  If you need convinced, he can persuade you.  If you need help, he's the first to put out his hand to pull you up.  He's a hard worker who knows how to relax, too, and he taught this to my sisters and me over the years by example.
Never ones to shirk from an adventure, he and Mom decided to buy a farm last year.  Now, some might find this odd, as Dad has been somewhat retired for many years now, but to those of us that know and love them both, this was zero surprise.  They bought this farm so that their grandkids would have a place to run free and wild to

explore, and where family and friends could gather often to recharge.  One thing they didn't count on was all of the food growing wild up there.  Every time we find something new, I am *compelled* to preserve it.  Our latest food adventure on the farm has been picking apples.  My sister identified the varietal as Pippins, once grown by Thomas Jefferson.  I identified them as an awesome target for making new fermented things...because *obviously* we couldn't just leave them there.  Instead, we picked gallons (and gallons) of apples and then started figuring out what to do with them.  I happened to have some tasty fermented cranberries hanging around from last winter, so I combined a few recipes and came up with the one below.
Note:  you could make this without the cranberries, and potentially, with fresh cranberries if you stew them with the apples.  I haven't tried that, but I would imagine it would work.  If you want to make the cranberries, go read how, courtesy of Christopher and Kirsten Shockey, here.

******
6 lbs apples, quartered and cored (unpeeled)
2 T. cinnamon
1 c. water
2 c. fermented cranberries, drained
3/4 c. brown sugar (unless your  apples are super sweet - Pippins are not)
3-4 T. honey (again, unless your apples are super sweet)
good pinch of kosher salt
1 T. culture starter dissolved in 1/4 c. water

Combine the apples, cinnamon, and water in a crockpot.  Cover and cook on high for 12 hours.  Provided the apples are nice and soft at the end of this 12 hours, drain, being sure to reserve *all* the cooking liquid.  Return the apples to the crockpot, along with the cranberries, and puree with an immersion blender.  Add back the cooking liquid a little at a time until you reach a consistency you're happy with.  Taste.  If you need the sugar and/or honey, add them now. Add the salt and stir very well.  Taste again.  Adjust as is necessary with sugar and/or honey until you like the result.  This can be really variable depending upon what kind of apples you use.
Keep the crockpot on high and re-cover.  Cook for 2 hours or so until you are pleased with the viscosity of the butter.

Cool for about an hour.  Meanwhile, dissolve the culture starter in water and set aside.  When the butter is about room temperature, stir in the starter and spoon into jars.  Loosely cap with lids and set on the counter for 3 days.  Along the way, taste.  When you are happy with the developed flavor, put the jars in the refrigerator to stop the ferment.

This makes about 2 1/2 quarts.

Monday, August 24, 2015

Kimchi Coconut Soup

I really love fermented things, and I ferment my own, often.  As such, I'm always looking for new ways to eat my delicious food in jars.  I also hate to throw anything out, so I'm always thinking about ways to use lots and lots of tasty veg in one dish.  I love Asian-inspired food, so I came up with this.

****

I've been eating this a lot (A LOT) lately.  With my son now in real school (aka Kindergarten) and both kids in sports activities, my crazy life has one speed:  hair-on-fire fast.  This soup is about as simple as it gets and it's *fast*.  Win-win.


Ingredients

2-4 c. sliced veg (shiitake, red peppers, pak choy, kale, etc)
1/2 c. kimchi*
1 can lite coconut milk
1/2 can water
salt to taste
1 lime, juiced

Technique

Slice all the veg and add it straight to a deep saute pan.  Add the kimchi.  Add the coconut milk, water, and salt (if desired).

Cover, cook on medium-high for about 5 minutes.  Then remove the lid, and cook an additional 10 minutes.

Remove from heat, add the lime.  Adjust seasoning if necessary.

HOW EASY WAS THAT?!?


*note:  I ferment my own kimchi (between the hours of midnight and 6a, to be sure), but any delicious kimchi you favor will work great in this recipe.


Thursday, April 23, 2015

This is why I cook, aka Ramp and Preserved Meyer Lemon Pesto

As previously discussed, we love pesto in this house.   My kids, do, I do, my extended family and friends do...and with good reason.  Pesto can be made with a myriad of ingredients (e.g. NOT JUST BASIL AND PINE NUTS) and it's good on almost everything.  This version came together out of my love of ramps and preserved citrus.  I had both on hand and wanted to do something fresh and approachable, yet bold and delicious.  Using ramps and preserved citrus eliminates the need for garlic or additional salt, so this comes together in about 5 minutes.

BONUS:  when you make pesto with greens instead of basil, it doesn't tend to turn all nasty and brown.

Ramp and Preserved Meyer Lemon Pesto

1 bunch of ramps, washed and trimmed, stems and roots sliced, leaves cut into ribbons
1 c. walnuts, toasted
3/4 (or 3 segments) of a preserved Meyer lemon (regular preserved lemons would work too)
1 c. salty, hard cheese, grated (I used ricotta salata that I cured, but Parmesan would also be delicious)
1/2 - 3/4 c. good olive oil

I like to make pesto in my food processor, but I suppose you could use whatever you like to use for such things.  Start the blade on the processor, and drop the stems and roots of the ramps through the chute.  Then add the walnuts, letting it run for a minute or so.  Add the preserved lemon and cheese, and then run until everything is really well minced and combined.  Scrape down the bowl and restart the blade.  Pour the oil through the chute until you get the consistency you desire.

Now, spread this on everything, storing any (temporary) leftovers in a jar in the refrigerator.  The pesto should keep about a week, but it never lasts that long in my house.

Thursday, March 5, 2015

The Kids Who Love Pesto - Making Pizza at Home

My kids love (and I mean LOVE) pesto.  They love it freshly made, they love it jarred in the winter.  They love it made traditionally with pine nuts and basil, and they love it made with arugula and walnuts.  Really, if it's got pesto on it, they're in.

When they were smaller, I often would serve them pesto pasta for dinner, topped with mozzarella.  Lately, while they still love that, they craze pesto pizza, or as my 4.5 year old son calls it, "That delicious green sauce pesto pizza."  What can I say, he likes to be exact, just like his mama.

There are many reasons to make pizza at home, but being able to feed a kid's craving is certainly one of them.  The bonus comes in letting the kids construct their own pie, which both empowers them to play an active role in what they eat AND encourages them to stretch their palates and try interesting-looking things.

We do, occasionally, go out for pizza, and my kids always ask for the pesto pizza.  Due to this, the staff at their favorite spot have always remembered us, dubbing my kids "the kids who love pesto."  Apparently, this is a bit of an anomaly.  While we do love "our spot", all of us prefer the DIY version. .

This is how we do it.

Make the pizza dough.  I use Jamie Oliver's pizza dough recipe as a starting point, but I've modified it to my preferences and general pantry staples over the years.

10 oz very warm (not scalding) water.  Aim for 120 degrees, but I never actually measure the temperature.  It should feel hot but very tolerable to hold your hand under.

2 1/2 tsp. dry, active yeast

1 T. turbinado, or raw sugar

1 1/2 tsp. kosher salt

2 T. good olive oil

3 1/2 c. white or blended bread flour (don't use all wheat, unless you really want a denser, drier dough)

Mix everything except the flour in a large bowl.  Let sit about 10 minutes until the yeast is foamy.  Stir in half of the flour, mixing with a fork.  Flour your hands.  Now, mix in half of the remaining flour with the fork, switching to your hands when the dough gets tough to work with the fork.  Add remaining flour a tablespoon at a time until the dough ceases to be sticky.  Remove the dough from the bowl and knead on a lightly floured surface until the dough is smooth (maybe two minutes worth).  Place dough in a clean, oiled bowl and turn to coat.  Seal the bowl with plastic wrap and set aside to rise 30-60 minutes.

Preheat the oven to 500 degrees with a pizza stone inside.  You can do this without a stone, but the crust won't be as crisp.  While the oven heats, roll out the dough in desired portions.  I like to use a pizza peel sprinkled with cornmeal.  Pierce the dough all over with a fork everywhere but the crust.  Once the oven is done preheating, add the sauce and toppings and slide into the oven  Cook until the cheese is bubbly and the crust is golden.  This takes around 7 minutes in my oven.

We like lots of different toppings, but I highly recommend trying pesto, mushrooms, mozzarella, feta, and giardiniera (for the adults, at least).  That's what I used in the picture above.

Sunday, March 1, 2015

Bruleed Grapefruit Martinis

As fruit goes, winter = citrus.  I particularly love grapefruit, and I've always got a bunch lying around.  Lately, I've been mixing grapefruit, in its many derivations, into cocktails.  After a bit of taste testing all around, this was the winner.  It's sweet enough, but not cloying.  It's killer smooth (which could get you in trouble...) It's totally worth trying.  Bonus:  you get to play with fire.

1/2 a ruby red grapefruit, cut on the bias
2 T. brown sugar
4 oz good, completely neutral American vodka
1/2 oz Grand Marnier

This is the fun part.  Sprinkle the brown sugar liberally all over the grapefruit, patting it in to adhere.  Using a kitchen-grade blow torch, brulee (which is French for burn - but don't really try to burn it to a crisp) the sugar until it caramelizes and starts to get gooey black spots.  Set it aside to cool a minute, and then squeeze the sugar and all into a cocktail shaker.  Add vodka and Grand Marnier, then some ice.  Shake very well.  Strain and serve.

Sunday, February 22, 2015

Healthy Ranch Dip

I decided that I wanted to make my kids baked chicken fingers with ranch dip.  Not the greasy, cholesterol-heavy version you find in a restaurant (as my son says, "Mommy!  We do NOT like Old MacDonald's."  I'll let you determine what he actually means...)  Anyway, we don't drive through, not ever.  My kids don't crave that kind of food, and I don't want them too.  That doesn't mean baked chicken fingers with ranch dip aren't delicious when done right.

Given that I am not a fan of mayo, and given that I have boxes and boxes of silken tofu in my pantry, I thought I would see if I could create a healthy alternative to the traditional ranch dip.  It came out great.


1 box silken tofu
3 T. buttermilk
juice of 1 large lemon
2 tsp. fermented garlic paste (or 1-2 garlic cloved, mashed)
2 tsp. dried parsley
2 tsp. dried chives
1 1/2 tsp. dried onion
1 1/2 tsp. kosher salt

Blend together however you wish and refrigerate to let the flavors meld.  I used an immersion blender in a blender cup.

NOTE:  I did not set out to make this vegan, obviously, given the use of buttermilk.  I'm sure it would be just as tasty veganized.

ANOTHER NOTE:  I used dried herbs in this version due to the astronomical cost and middling quality of herbs in the dead of winter.  I'll try this again in the summer when I can pick the herbs fresh from the garden.

Friday, February 20, 2015

Celery Soup with Cornbread Croutons

I love soup.  I especially love soup when the windchill hits -20F and below...I also love celery, the much maligned veg that it is.  Add that together with my somewhat insane commitment to trying to use up all of the food in my house before it spoils (therefore making the most of my Costco membership, potager, etc.) and creating as little waste as we can, and this soup came out.  It tastes exactly like celery, so of course, I love it.

For the record, my list of #useitallup for this recipe was celery, buttermilk, and cornbread.

1 large bunch of celery, cleaned of dirt and any soft spots, chopped into 1/2" pieces
1 large onion, diced
1 tsp fermented garlic paste (or 1 tsp minced garlic)
1/2 tsp celery seed
kosher salt
freshly cracked black pepper
2-3 T. olive oil
1 c. buttermilk, well shaken
3 T. heavy cream

Combine celery through olive oil in a large soup pot over medium heat, adjusting salt and pepper to taste.  Saute over medium heat until the veg starts to brown just a bit.

Stir in 3 c. water and continue cooking over medium heat for about 8 minutes.

Remove from heat and puree.  (I used an immersion blender, but you can also use any blender you wish.)

Return to the pan (if necessary), and stir in buttermilk.  Bring soup up to temperature, and puree again if you aren't satisfied with the consistency.

Remove from heat again and stir in cream.  Top with croutons.

Cornbread Croutons

Start with a really tasty cornbread recipe.  I like no-sugar-added cornbread, but you can use whatever you like.  Cut 12 1" cubes out of the cornbread and allow to dry on the counter if the cornbread is fresh.  The goal here is to have stale cornbread cubes.  You can also dry them out in a low oven, around 300F for a few minutes if you wish.

Melt 2 T. butter in a saute pan and then add the cornbread cubes.  Toss and turn, so that all sides are coated in butter.

Saute until golden brown, flip over, and repeat.


Monday, January 19, 2015

Italian Beef (and nachos)

Why should you make Italian Beef at home?  Well, because it's delicious, of course, but also because #ItalianBeefNachos and #ItalianBeefGrilledCheese.  My kids and I are hooked.

Italian Beef, Crock Pot Style

3 1/2 lb chuck roast
kosher salt
freshly cracked black pepper
1 tsp. granulated garlic
1 tsp. dried oregano
1 tsp. dried basil
1 tsp. dried parsley
2 tsp. crushed red pepper
2 tsp. fermented garlic paste (or 3-4 cloves, minced)
1/2 c. dry, fruity red wine
1/4 c. soy sauce
1/4 c. Worcestershire sauce


Place the roast at the bottom of the crock pot.  Season with salt and pepper, then the garlic, regano, basil, parsley, and crushed red pepper.  (I just dumped it all on the rbeoast, given that I was making this at 1a.)  Add the fermented garlic paste and top festively with the wine, soy sauce, and Worcestershire.
Cover the crock with the lid.  Turn it on low.  GO TO BED.

8-10 hours later, the meat will fall apart.  I like to remove it from the crock separate out and toss the gristle, etc., and then shred it in the sauce (in the crock).  Leave it on warm if you must, but do watch that it doesn't start to caramelize too much or run dry.

Traditionally, this would go on a soft roll with giardinera and provolone (which is delicious).  Alternatively, shred some into a provolone grilled cheese for the kiddos (mine asked for it specifically three days in a row) or use as nacho toppings along with salsa verde, avocado, cheddar, jalapenos, and sour cream.  YUM.

p.s., yes these nachos are as good as smoked turkey nachos.

Roasted Squash and Swiss Chard Soup: Teaching Kids to Crave Veg, One Bowl at a Time

I cook for my kids all the time.  My son is four, and while he went through a picky phase, he now proclaims me to be "the best cooker" and prefers to eat at home over a restaurant...at least for now.  My daughter is two, and she's my little foodie.   This kid loves everything from hummus to bibimbop to lamb shoulder.  If it looks good, she wants it.

All this being said, I had hesitated to feed them soup for dinner.  There were many reasons for this, not the least of which was the imagined MESS, along with the potential they would balk at "baby food" or otherwise unrecognizable pureed tasty stuff.  That turned me off from pushing soup for a while, but, I do love soup, especially in winter.  So, I decided to remember that I'm grown, I can clean, and I gave it a whirl.  As usual, they surprised me, and I couldn't be more pleased with the results.

It's easy to teach kids to love soup when you pay attention to texture and consistency.  Plus, if you make it thick enough they will only minimally succeed in painting the kitchen.  People are amazed that my kids love squash, chard, mushrooms, and in general, most anything I make tasty for them.  It's all about seasoning and repetition.  Give kids real food that tastes delicious, and they are bound to like it.  They will learn to expect it.

This go round is vegetarian and can easily be made vegan.  Admittedly, my son asked where the bacon was.  What can I say?  I cure and smoke bacon, and he loves it.  Not the worst critique I can imagine.

Roasted Squash and Swiss Chard Soup

1 medium (~ 2.5 lbs) orange winter squash.  I do not know what the name is of the one my daughter picked out at the farmer's market, but it was similar to butternut.  You are looking for about 2 c. of puree after roasting.

kosher salt

olive oil

Heat an oven to 375 degrees.  Meanwhile, but the squash in half and clean out the pulp and seeds.  Sprinkle with salt and brush with oil.  Roast uncovered on a tray until the squash is soft throughout and starts to brown.  Remove and cool.  Scoop out the flesh and set aside.

1 large onion, diced

1 very large bunch of Swiss Chard (I probably had 10 substantial stems with large leaves).  Remove the stems, cut off the bottom bit, and then chop.  Set the leaves aside for later.

4 stalks celery

3 large garlic cloves, minced

olive oil

kosher salt

freshly cracked black pepper

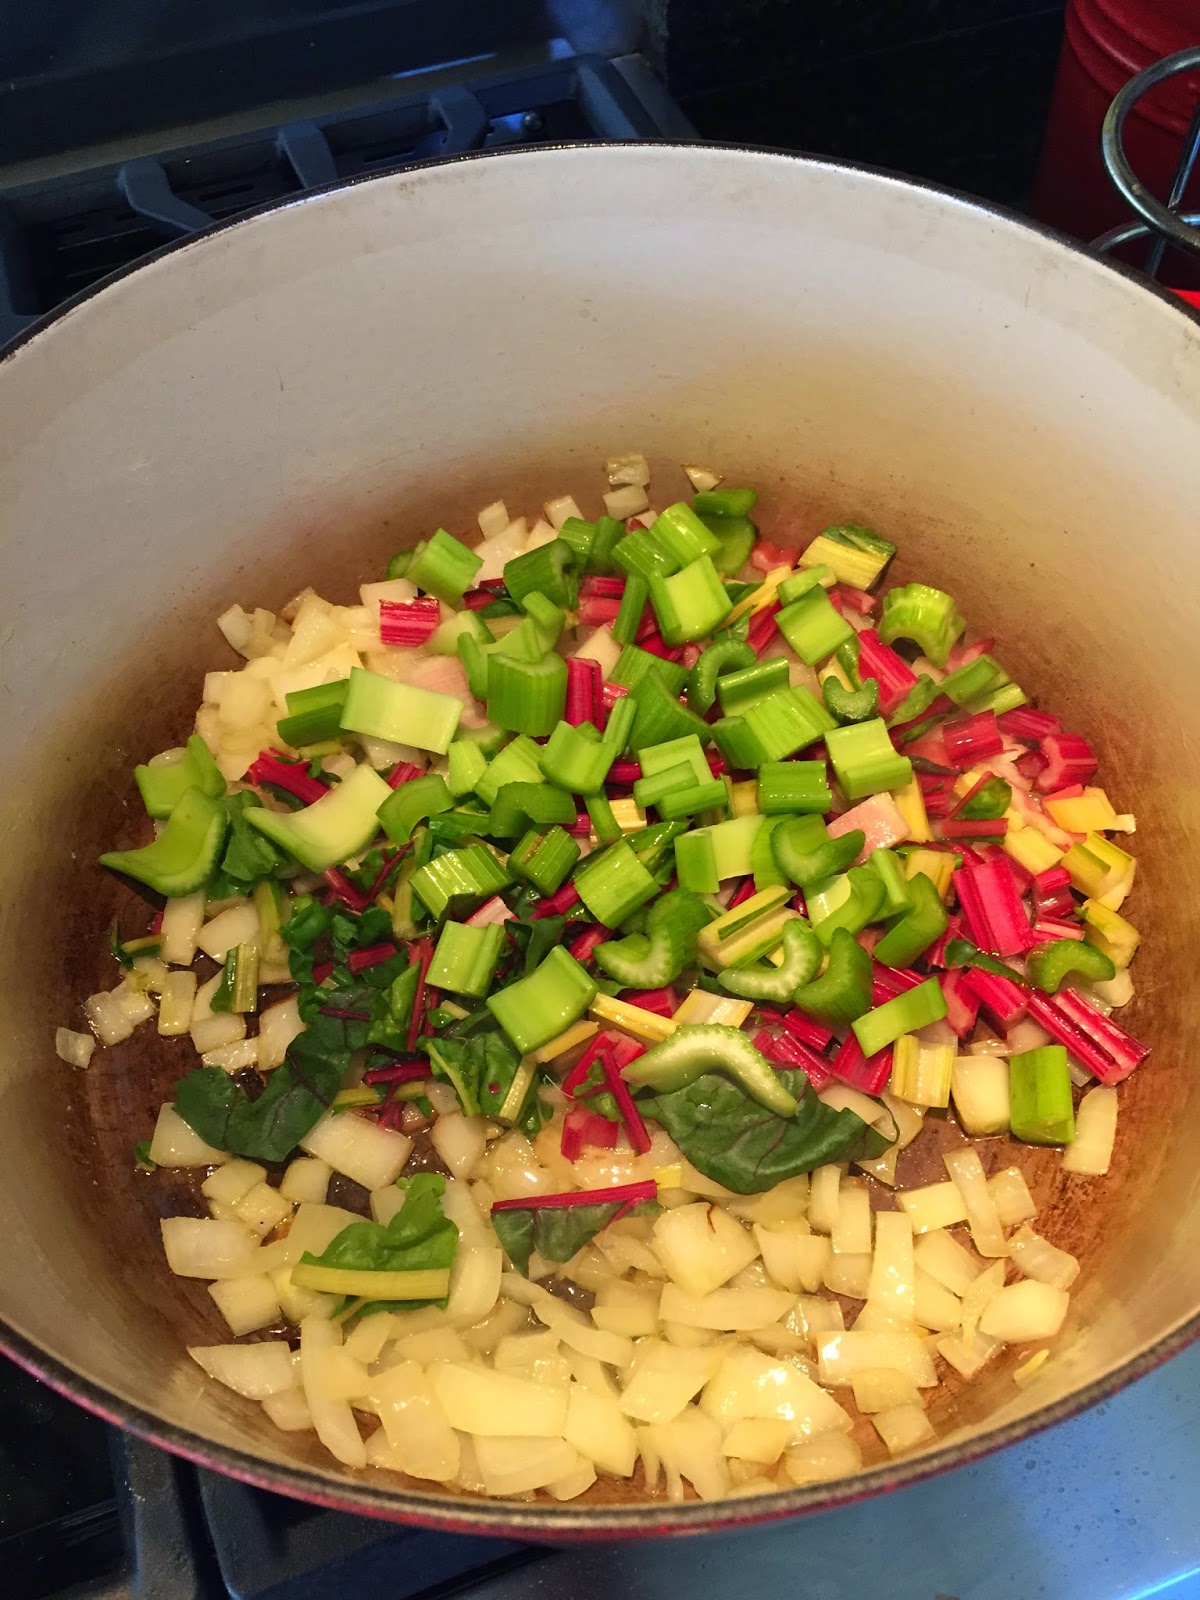
Toss the onion, chard stems, celery, and garlic into a large soup pot heated over medium-high with a good glug of oil, then season with salt and pepper.  Cook partially covered until the veg just starts to caramelize.

1/2  c. dry white wine

6 c. water

1 lemon, zested and juiced

Deglaze the pot with the wine and increase the heat.  When the liquid is essentially gone, stir in the puree and chard leaves.  Cook, stirring, until combined and wilted.  Add the water, stir again, and reduce heat to medium.  Partially cover and let alone for 20-30 minutes.

Remove pot from the heat and puree with whatever tool you prefer.  I used an immersion blender.  Taste the soup, adjusting salt as needed.  Stir in the zest and juice.

Creme Fraiche for serving

Ladle soup into bowls and add a large spoon of creme fraiche.  Tell the kids to swirl it (because it's fun, of course).

Now, eat, enjoy, and repeat.

NOTE:  My kids aren't bothered by the slight bitterness of the chard.  If yours are, substitute baby spinach and add extra celery.


Saturday, December 13, 2014

DIY Holiday - Techniques, Recipes, and Strategies

Every year I tell myself I'm not going to make all my holiday gifts.  "This year, I'm going to make it easy on myself."  And then I have a good laugh and set about making my plan for holiday gifting.  I find that so long as I have a good stable of techniques, pragmatic strategies, and delicious recipes, I survive just fine and end up being so grateful I took it on again.

Packaging 
  • Packaging beautiful food is easy when you have clear glass jars.  I like to cut rounds of my favorite wrapping paper to the size of the lids and simply place it between the lid and ring.  You don't need glue, tape, or anything else.  The ring secures it just fine.  Then, if I'm feeling fancy, I might wrap hemp or other twine around the jar and add a sturdy cardboard gift tag.  Be sure to let your giftees know they will need to keep the olives in the refrigerator.
  • I also like to buy the Avery chalkboard labels.  I buy the big oval ones and cut 1 1/2" circles out (2 per) with a hole punch.  The size is perfect for the front of a jelly jar.  Then, I write the contents on the label with a neon chalk marker.  
  • If you're in search of the clear cellophane bags you see at the stores this time of year, check Amazon.  I like the 9"x12" and 4"x6" bags.  Dry goods, such as biscotti, nuts, and cookies look great in bags.  All I add is hemp twine and maybe a sprig of greenery, if I feel like going out to cut it.  If you have holly, a couple of leaves and a berry cluster is about as good as it gets for winter.
  • In general, less is more when packaging food.  Let the food shine.
Gameplan
  • I find it's important to make a plan in advance.  If your life is anything like mine, free time is rare and precious, and if you want to gift things that need prepared a few days or less before giving, you need to time it out.  This is not to say you need to spend a lot of time or energy making a schedule, but be realistic.  If you don't have time in the couple of days before the gifting target, pick things that can be made a week or more in advance.
  • Picking recipes that can be made in large batches is handy when preparing multiples.  Not every recipe can be successfully doubled or tripled.
  • Don't be above child labor, especially for teacher gifts...my kids LOVE to help, and they are so proud to give their teachers things they helped make.  That being said, be realistic.  If the kiddos are helping, let go of the perfectionist tendencies.  Their smiles are worth it, and it encourages their generosity, while applauding their work ethic.
Recipes
  • This year has been the year of TOO MANY IDEAS.  I've been experimenting and taste-testing, and thus far, I've still got too many ideas swirling about.  It's a good problem to have, and it keeps the ones I love well fed and happy.  That being said, I have already started, and as such I have picked out a few stellar selections for our primary gifting.  I make sets of 6 or 12, usually, and plan with the idea of combining two items for a complementary gift package.  (See cellophane bags above.)
  • Here are a few of the greatest hits:


    • Fig, Chile, and Orange Marinated Olives
    • Chocolate Dipped Figs with Sea Salt
    • A rift on the Food and Wine Maple Pecans:  Substitute chipotle chile powder OR dried thyme for the cayenne pepper.  Better yet, make a batch of each, but be sure to package separately.
    • Spicy Pickled Carrots.  These are a favorite all around, and they are shelf-stable if you can them properly.
    • Ginger-Pickled Grapes.  These are simple...place a coin of peeled fresh ginger, an inch stem of fresh rosemary, and a few black peppercorns at the bottom of an 8 ounce jelly jar.  Top with halved purple grapes.  Measure in two tablespoons of granulated sugar, shaking the jar to distribute if necessary.  Heat to boiling 1 c. white wine vinegar, 1 c. water, and 1 tablespoon of pickling salt.  Ladle into jar until full, wiping the rim, and capping tightly.  Store in the refrigerator.
    • A rift on the Food and Wine Fig and Hazelnut biscotti:  I substituted whole, blanched almonds.  I love how whole almonds slice in biscotti, but be sure to use blanched almonds.  The skins don't work in biscotti.

DIY Holiday - Fig, Chile, and Orange Marinated Olives

There is something about gifting delicious food in beautiful packaging that just makes it feel like Christmas.  It's easy to walk into any store and buy presents, but making hand-crafted, handmade treats is so much less work than one might think.  It's not hard...or time-consuming...or expensive.  All you need is a strategy, a game-plan, and a few recipes.

I am a particular fan of marinated olives.  On the one hand, they make pretty gifts in jars.  On the other hand, and much more importantly, they are delicious.  This recipe was inspired by a taste memory inspired by the fantastic Holland House Bar and Refuge in Nashville, Tennessee.  If you are in town, I definitely recommend making a reservation.  In the meantime, get to marinating olives.  They are positively addictive

1 tsp fermented chile paste (if you have it, otherwise, bottled Asian chile paste)
The zest of two oranges
2 c. pulp-free orange juice
12 dried calimyrna figs, chopped
2 T. sugar
2 T. Sriracha
1/2 tsp salt
16 oz good olive oil
5 c. whole Castelvetrano olives
1/2 c. whole, blanched almonds


Combine the first seven ingredients in a large capacity pot.
Bring to a boil and reduce for about 10 minutes or until it starts to look syrupy.

Once the sauce has reduced to your desired consistency, stir in oil and olives.

Return to a boil, then reduce to a simmer.  Cook uncovered for about 5 minutes.

Remove from heat and stir in almonds.

Olives can be served immediately, but will benefit from a few days storage in the marinade.  Be sure to keep in the refrigerator.

Sourcing

I like to buy large cans of olives on Amazon.  While in my alternate, perfect world I might buy these directly from the growers in glass jars, I live in Indiana, and this is the best source I have found.  I particularly like these unpitted green olives, because they are delicious on their own and have no additional seasoning in the brine.  ALERT:  these olives are only $25 for approximately 8 dry cups.  This is beyond affordable.

I also buy the almonds on Amazon.  I burned too much gas and far too much time driving around Indy, trying to find them.  You can buy a full pound (which is many times over what you need) for $15. 

As for the figs, I bought them at Costco.  In our house, we LOVE figs.  I have no trouble using up the wholesale-size bag.  Two pounds run around $10-15.

Packaging

Packaging beautiful food is easy when you have clear glass jars.  The bright green of the olives plays against the earthy oil brine and needs little embellishment.  I like to cut rounds of my favorite wrapping paper to the size of the lids and simply place it between the lid and ring.  You don't need glue, tape, or anything else.  The ring secures it just fine.  Then, if I'm feeling fancy, I might wrap hemp or other twine around the jar and add a sturdy cardboard gift tag.  Be sure to let your giftees know they will need to keep the olives in the refrigerator.

Tuesday, November 11, 2014

Winter greens with Green Apple Vinaigrette

I love Thanksgiving.  It's all about food, family, friends and taking stock of what you have.  My kids and I are so fortunate.  We have our health, each other, more than enough delicious food at every meal, and our cozy home in which to enjoy it all.  I like traditional Thanksgiving, but as defined by me.  I like to take tradition and flip it. 


Here's a great side dish that I am making again this year.  It's easy to throw together and it's a great complement to the rich turkey dinner.


10 c. baby kale
2 c. shaved Brussels sprouts
1 c. pomegranate seeds
4 clementines, peeled and segmented
1 c. dry toasted walnuts, chopped
Apple Vinaigrette to taste (~1/2 c)
 
Mix together all ingredients and dress to taste
 
 
Apple Vinaigrette
1 medium granny smith apple cored and diced
1/2 c. raw, unfiltered apple cider vinegar (I like Trader Joe's brand)
1-2 T. fresh lime juice
2 tsp. agave nectar
1 small shallot, minced
3-5 T. olive oil, to taste
kosher salt and pepper to taste
 
Combine apple through shallot in a blender and puree until smooth.  Drizzle in oil while continuing to run the blender.  Season to taste.

Tuesday, September 9, 2014

Addictive Brined and Smoked Fresh Ham


I have never been a fan of ham.  Spiral-sliced, country-style, Black Forest,...doesn't much matter.  My take away is almost always <meh>.

Enter Royer Farm Fresh and the fresh hams I have bought from them over the years.  Being the type that always (always) prefers to do it myself, I thought perhaps I could improve my ham experience by brining and smoking a fresh ham to my taste.  I tinkered with my recipe over the last few years, and now I quite literally crave (my) ham.  It's great on a hors d'oeuvre tray, in a cuban, straight out of the refrigerator,...you get the idea.  It's YUM.

Turning a fresh cut of meat into something cured and smoked takes equipment and time.  It's not hard, but it doesn't happen in an hour.

What do you need on hand?  

A large enough pot to hold the brine and ham, with the ham fully submerged.  It's helpful if this is a giant stockpot with a lid, wider than it is tall, but I suppose most anything would work.

A charcoal or gas grill, good lump charcoal (or gas), and hickory wood chunks (not chips).

A large (4-7 lbs) bone in fresh ham.  This is just the ham CUT of pork.  A fresh ham has not been brined, cured, smoked, etc.

Brine


Make the Brine

Combine in the large stockpot:

1 1/2 cups each kosher salt and the best sugar you have (I like my organic raw sugar, it's finely ground, but it's not chemically stripped)

8 cups water

1 large orange, sliced into rounds

1 large lemon, sliced into rounds

2 large limes, sliced into rounds

1 whole head of garlic, sliced on the bias

1 large onion, sliced however makes you happy

2 T. fresh oregano

1 tsp. whole black pepper

Bring all this to a boil, cover, remove from the heat, and let cool completely to room temperature.


Brining the Ham

Once the brine is at room temperature, remove the ham from it's wrapper and submerge fully into the brine.  Be sure it stays completely covered by the mixture.  Cover the pan and place into the refrigerator for 3 days.

>>This picture is what the ham looks like upon removal from the brine on day 3.

Smoking the Ham

After 3 days, pour off the brine liquid, remove the ham, and discard the solids.  Bring to room temperature.  Meanwhile, soak 4-5 cups of hickory chunks in water.  Be sure to soak the wood for at least a couple of hours.

Prepare the grill to a high indirect heat (e.g. over to one side), remove the wood chunks from the water, and place them directly on the charcoal (or whatever your gas grill instructions say).  Close the grill lid immediately and let the smoke develop, about 5 minutes, until it's billowing out and smells delicious.

Place the ham as far away from the direct heat source as is possible.  Close the lid and leave it alone for an hour.  Flip the ham over (both right to left and top to bottom) and let smoke another hour.

Remove the ham from the grill and place it into an oven-proof large pot with a lid.

Finishing the Ham

Ham is extremely lean, so after a couple of hours on the smoke, I like to finish it on a very low temperature in the oven.

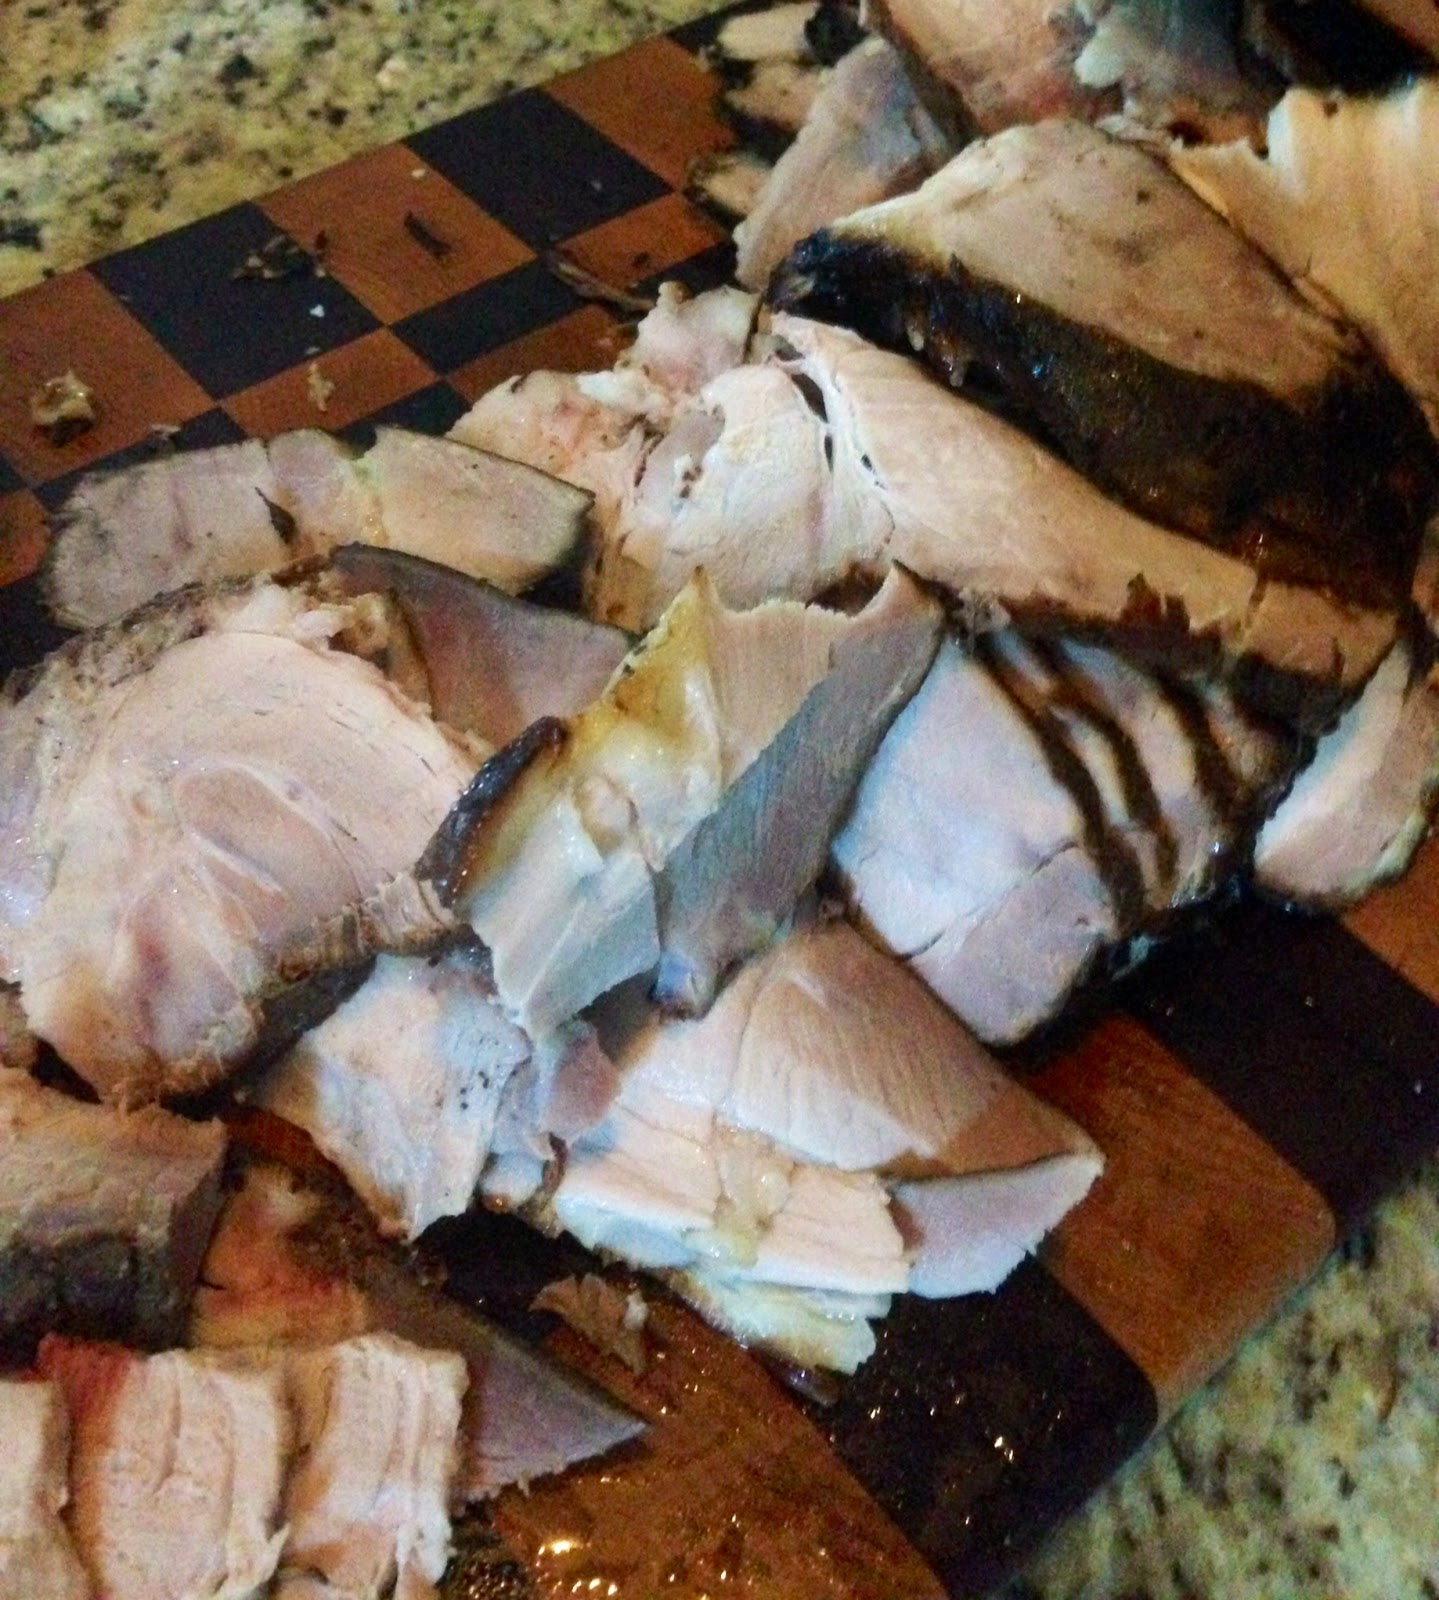
Bake the covered ham at 200 degrees until it reaches an internal temperature of 155 degrees.  Remove the pot from the oven and remove the lid.  Allow ham to rest at least 30 minutes (or longer) and slice.

Now, try not to eat it all while standing over the cutting board.

Wednesday, September 3, 2014

Chipotle-Cherry Barbeque Sauce


I have a love-hate relationship with BBQ.  I know, it's un-American, but that's how it is.  While I love to smoke fresh and/or brined meat at home, I often find the combination of heavy smoke and sticky-sweet sauce unpalatable (for me).  Then, earlier this year, I was making shrubs (drinking vinegars).  As I struggle to ever throw anything out, and am always trying to repurpose, reuse, use up everything I have, I needed to do something with all the pickled cherries I had on hand.


Feeling creative one Sunday, I started concocting...and it was a hit.  I love it, my 2 and 4 year old love it, my parents love it, etc. etc. 

I used this on mesquite-smoked baby back ribs, but I think it would go great on any BBQ.

1 c. black cherries soaked in simple syrup or leftover from making a cherry shrub (guess which ...
one I used)
1 c. ketchup
1/2 c. cold brew coffee
1/3 c. unfiltered apple cider vinegar
3 T. Worcestershire sauce
2 T. sorghum molasses (I'm sure regular will do)
1 T. whole grain mustard
2 tsp. chipotle powder
2 tsp. kosher salt
2 tsp. cumin
1 tsp. freshly ground black pepper

Chop up the cherries and mix all ingredients together. Cook over medium heat, stirring well and often until a desired consistency. I like to stop the sauce when it's still a nice, red color, and then use it as a basting sauce over open flame. If you don't intend to cook it twice, so to speak, go ahead and reduce the sauce further, almost until it turns a browner red and has the consistency expected of barbeque sauce.

Smokin' Green Enchilada Sauce

Tomatillos, tomatillos, tomatillos.  They are multiplying every time I go out to the garden.  I needed a fresh idea, after canning some two dozen jars of ubiquitous salsa verde.  But what to make?  I am always looking for things to feed my kids, and I've been pondering enchiladas.  I am notoriously dedicated to making everything I can from scratch at home, so of course, I set about to make a tasty enchilada sauce.


I did a bit of research into what goes into a traditional enchilada sauce, and since I had some Bulgarian carrot chiles that needed using, I decided to substitute for the jalapenos.  Pro/con:  Pro, this sauce is *delicious*.  I'm so very pleased with how it turned out; con, it's smokin' hot...maybe too hot for my kiddos.  C'est la vie, as it were.  I am now the happy owner of 4 pints of put up green enchilada sauce that *Mommy*, at least, will devour, come winter.  


It's simple, delicious, and will thaw you out when the deep freeze hits this winter.


Ingredients


2 lbs tomatillos
4 poblano peppers
3 Bulgarian carrot chiles (or substitute as you wish)
1 large onion (about 1 cup)
4 c. chicken stock
1 bunch cilantro
kosher salt
olive oil


Technique


Remove the husks from the tomatillos, wash, and place on a baking tray.  Deseed the peppers, slicing all the way down one side and flatten on the baking tray with skins up.  Quarter the onion and separate the sections, adding them to the tray.

Drizzle the trayed veg with olive oil and sprinkle liberally with kosher salt.

Roast in a 450 degree (or 425 convection) oven for 30 minutes.

Dump the veg into a large soup pot and stir in stock.  Simmer over medium-high for 15 minutes.  Chop cilantro and stir in, then puree with an immersion blender. 

If necessary, adjust seasoning.  Pour into clean jars or ziplock bags. 


You will want to eat this within a week or freeze it.  The low acid content makes it a bad candidate for water bath canning, and it's not tested for pressure canning.  If you choose to not freeze, be sure to store in the refrigerator.


Makes 4 pints.
Smokin' Green Enchilada Sauce on Punk Domestics